
If you've ever held an airbrush and thought "I have no idea what half of this does," you're not alone. That was us too.
(Disclaimer: Promotion and Discount Code below)
The first thing we do whenever we get a new airbrush is take the entire thing apart. It sounds like a strange way to start, but it's the fastest way to actually understand the tool instead of just hoping you're using it right.
Most airbrushes share the same core parts, even if the exact design varies model to model:
- Paint cup feeds paint into the airbrush by gravity
- Handle so you can actually hold the thing
- Fluid control knob adjusts how much paint sprays (on some models)
- Needle opens or blocks the nozzle to release paint
- Needle chucking nut secures the needle to its guide
- Air cap and nozzle cap direct airflow and protect the nozzle and needle
- Quick release lets you disconnect from your compressor hose fast (often sold separately)
- Air valve what the trigger presses to let air through
- Dual-action trigger press down for air, pull back for paint
- Spring and spring guide return the trigger and needle to position
- Spring case holds the spring components in place (some models)
- Needle chucking guide guides the needle forward and back
- Airbrush body where needle, paint, and air all meet before exiting through the nozzle
Not every airbrush is built the same. Better materials and engineering in higher-end models make a real difference in how consistent and reliable they feel in practice.
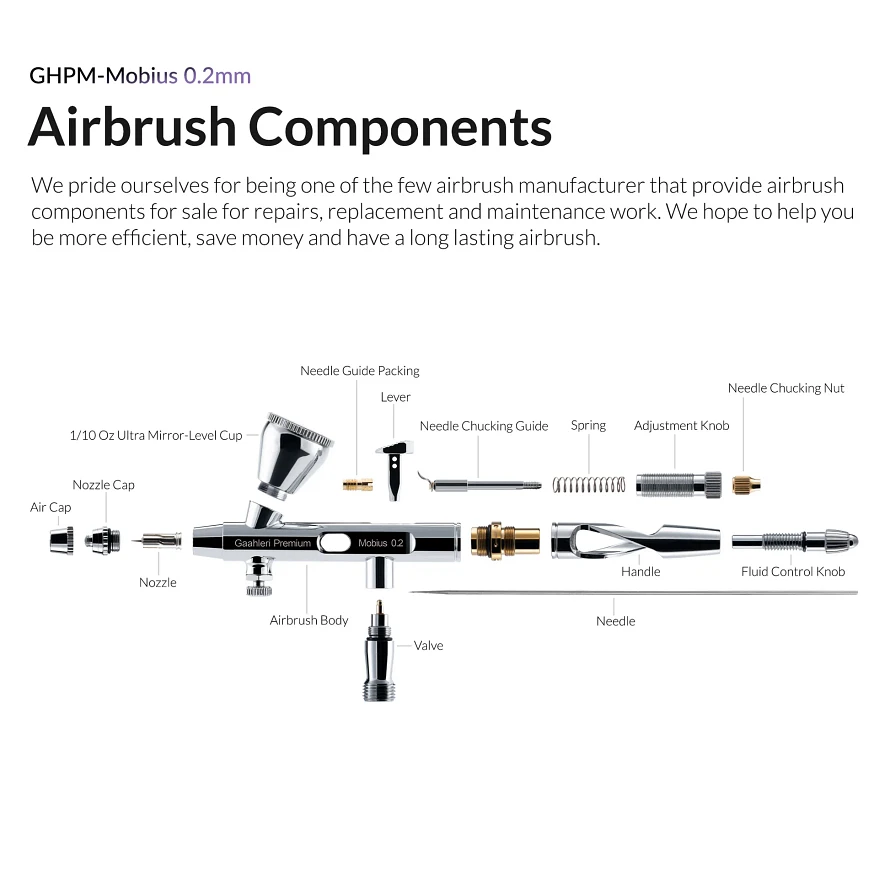
This breakdown features the Gaahleri Mobius 0.2, the airbrush we now use for all our airbrush projects.
- Use the code CCM gets you 10% off on their site ↗️ anytime.
- And if you're shopping during Prime Day (June 23-26 2026), code ODDLV8BN gets you an extra deal on their Amazon US store. ↗️
🎥 Watch the full breakdown on YouTube! ↗️