
Edge highlighting is one of those techniques that looks simple in theory but can be challenging in practice. A thin, consistent line of lighter paint along a sharp edge. That is all it is. And yet it can be really easy to drop off the edge and mess up your nice paint job.
Most of the time, the problem is not the brush. It is the hand holding it.
(Disclaimer: This post contains a Golden Maple promotion and a discount code below.)
What edge highlighting actually is
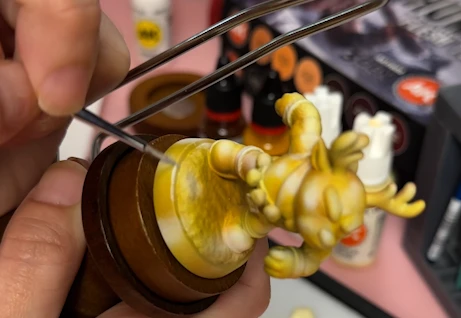
Edge highlighting is applying a lighter colour along a raised edge to make it stand out. It mimics the way light catches sharp surfaces, making shapes easier to read and giving the mini more visual definition.
It is used on armour panels, weapon blades, clothing folds, and any area where two surfaces meet at a clear angle. Even a simple, single-pass edge highlight makes a significant difference in how finished a mini looks.
Why the hand matters so much
Unlike dry brushing or washes, which are forgiving techniques, edge highlighting is a precision technique. The line needs to be thin, it needs to stay on the edge and not spill onto the face of the surface, and it needs to be consistent in width across the whole area.
Any small movement in your hand changes the line. And unlike a stroke that goes slightly off on a broader surface, a wobbly edge highlight is immediately visible.
How to stabilize your hand
Stability comes from contact points, not from tensing your muscles.
A few approaches that work well:
-
Rest your painting hand against the table. Even a light contact point reduces floating movement significantly. You are not gripping anything, just letting your hand touch down.
-
Bring your hands together. Hold the mini in one hand, brush in the other, and let them touch. Now both hands move as one unit. Small corrections become much easier to control.
-
Rotate the mini instead of your hand. If the angle feels awkward, turn the mini rather than twisting your wrist. This keeps your brush in a natural, controlled position. This is a lot easier to do for small minis if you are using a painting handle.
- Pause your breathing briefly for very precise strokes. This sounds unusual but it works. Your body moves slightly with every breath. For a single critical highlight, a short pause gives you a still moment to work in.
- Pull the brush, do not push it. Pulling keeps the tip together and produces smoother, more predictable lines. Pushing tends to split the tip and makes the stroke harder to control. Most of the time, you can also use the side of the brush instead of the tip.
Where a painting handle comes in
A handle does a few things beyond just giving you something to grip.
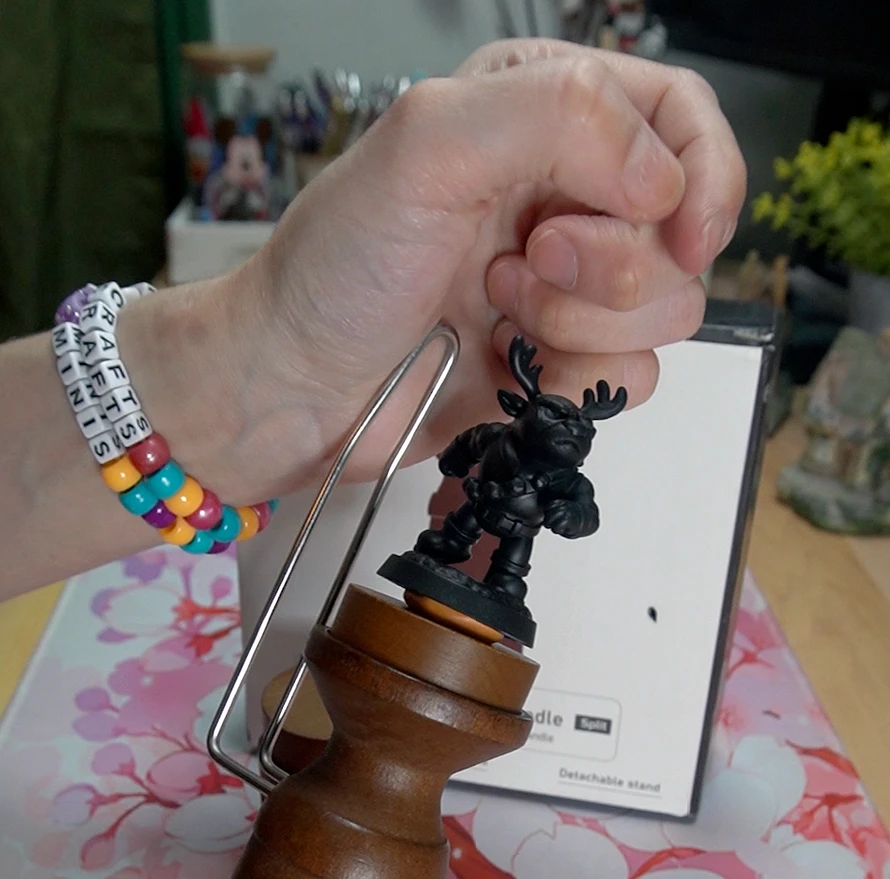
The main one is that it provides a surface to brace against. By pressing the side of the handle against your other hand or against the table, you create a stabilizing contact point without limiting how you can move the brush. Some handles come with a stabilizing metal bracket. It provides additional contact points and extra angles for added precision and reaching areas that can be difficult.
It also lets you rotate the mini freely without putting your fingers near the paint, and it keeps the mini at a consistent height and angle while you work, which matters more than it sounds when you are trying to match highlight width across a long edge.
We received the Golden Maple handle to try and it has become the one we reach for without thinking. Code CoupleCraftsMinis gets you 15% off if you want to try it: Golden Maple Painting Handle. ↗️
What to watch for
Even with a steady hand, edge highlighting can go wrong in a couple of consistent ways:
-
Lines too thick. Usually a paint consistency problem. The paint is too fluid and spreads when it touches the surface. Thin slightly less, or remove more excess paint from the brush before applying.
-
Blobs at the start or end of strokes. Too much paint loaded. Unload on your paper towel before each stroke, not just at the start of the session.
- Inconsistent width. Usually pressure. You are pressing harder at some points than others. Light pressure and letting the edge of the brush or the tip do the work solves this more reliably than trying to consciously keep the line even.
- Too much contrast. The highlight colour is too light relative to the base. Start closer to your base colour and work up gradually rather than jumping straight to a bright highlight in one pass.
💡 If you want more mini painting tips, you can download our free mini painting guide and read through our Getting Started page.